Profiles
This guide will take you through everything related to your personal Profile page in Keystash. You reach it by clicking your name in the top-right corner of the app and then "Profile". This is where you manage your own account details and your Personal Access Tokens for the Keystash API.
Info
This page covers your personal Profile. For plan, billing, payment methods and usage, see My Account & Billing, which describes the other sections of the same account screen.
Personal Access Tokens
A Personal Access Token lets you call the Keystash API in place of your username and password. You present it on each request as Authorization: Bearer kst_…, and it stays valid until its expiry date or until you delete it, so there is no repeated login step. This makes tokens ideal for scripts, integrations and AI agents. We recommend creating one token per integration so you can revoke a single token without disrupting the others.
Create a Personal Access Token
- Click your name in the top-right corner and then "Profile". Scroll to the "Personal Access Tokens" card.
- Click "Create Token".
- In the "Create access token" dialog, enter a Token name. Name it after where you'll use it, for example "My CI Deploy Token", so you can recognise it later in the list.
- Choose an Expires option. The choices are In 7 days, In 30 days, In 60 days (the default), In 90 days, In 1 year, In 2 years, and No expiration.
-
Click "Create Token".
-
Copy the token from the "Personal Access Token created" dialog using the copy button, then click "Done".
Warning
Copy this token now. For your security it is shown only once and cannot be retrieved again. If you lose it, delete it and create a new one. Store it in a secrets manager, never in source control.
Using Your Token
Send the token in the Authorization header on your API requests as Authorization: Bearer kst_…. See the Authentication page for a full request example and the error response you'll receive if a token is invalid.
Warning
A Personal Access Token has the same permissions as the user who created it — there is no way to limit a token to a subset of actions. Treat it like a password. We recommend creating each token under a dedicated integration user whose Role grants only the access that integration needs, and creating a separate token per integration so you can revoke one without affecting the others.
Token Status & Expiry
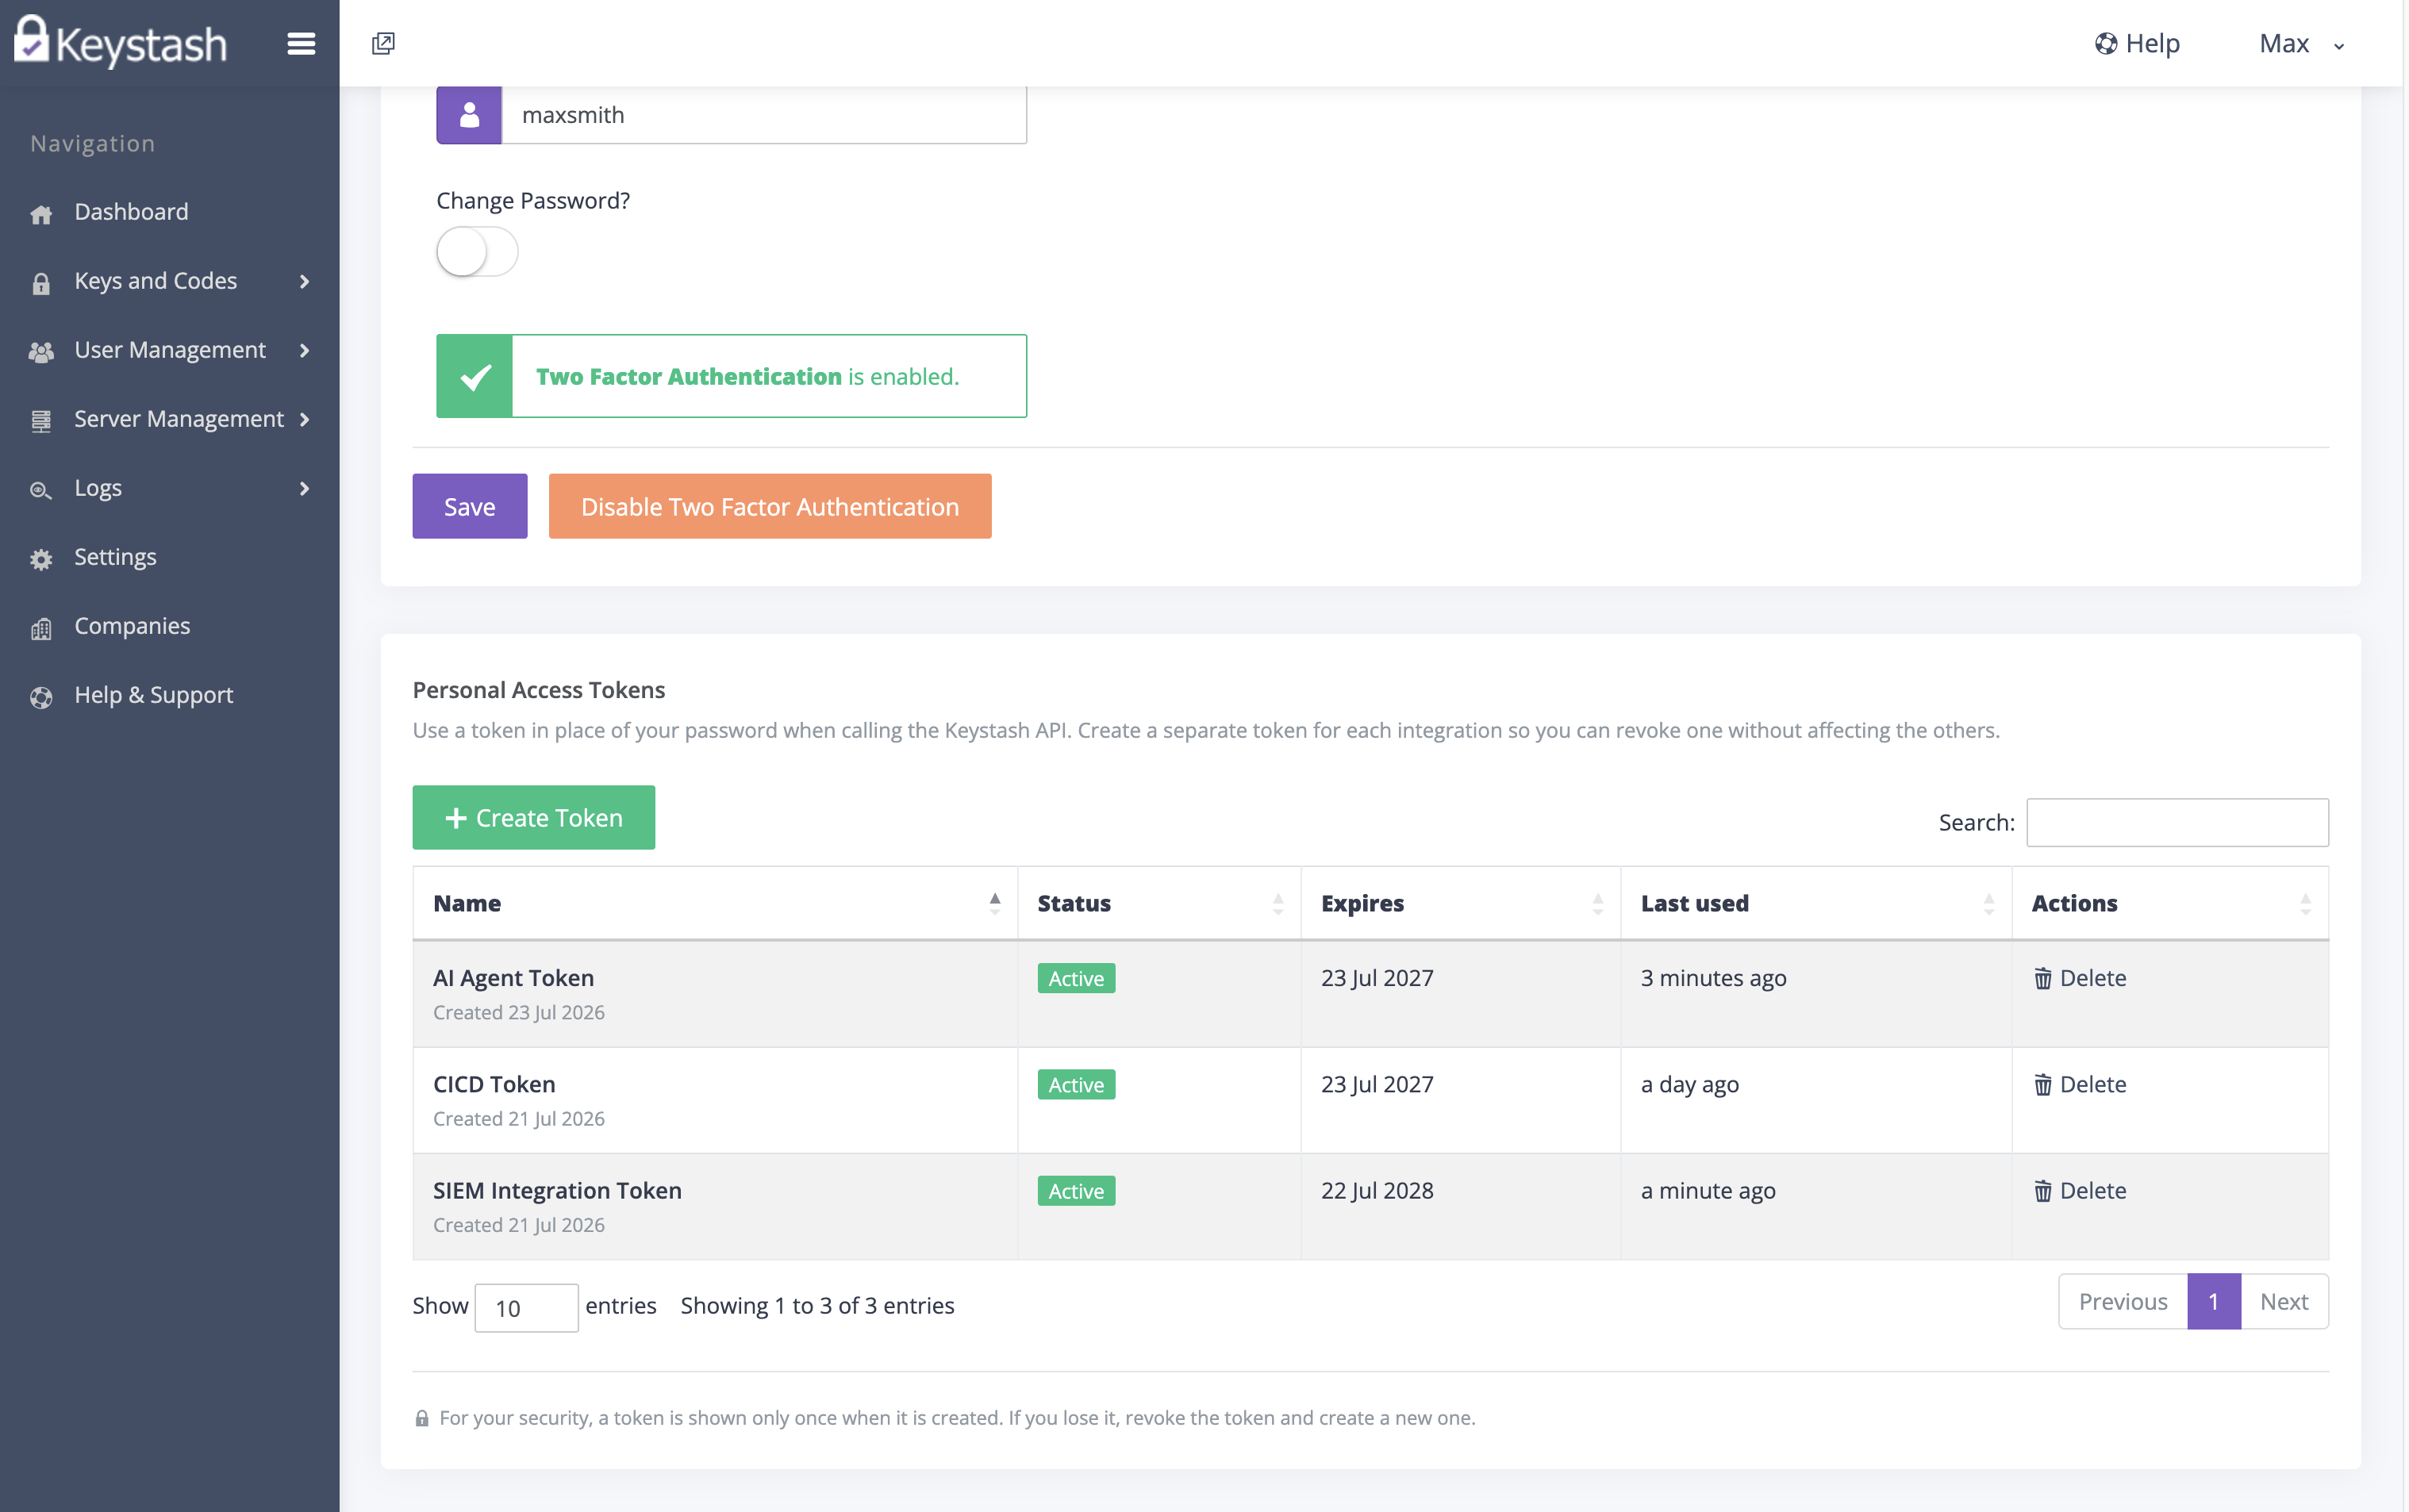
The "Personal Access Tokens" card lists every token on your account with the following columns:
- Name — the friendly name you gave the token, shown with the date it was created.
- Status — a derived status of Active, Expiring soon (within 7 days of expiry), or Expired.
- Expires — the token's expiry date, or Never if you chose No expiration.
- Last used — a relative time showing when the token was last used to authenticate, or Never if it has not yet been used.
- Actions — where you delete a token.
Info
Keystash emails the token owner 7 days and 1 day before a token expires, so you have time to create a replacement and update your integration before it stops working.
Delete (Revoke) a Personal Access Token
- In the "Personal Access Tokens" card, find the token and click "Delete" in the Actions column.
- Click "Yes, delete it!" when prompted.
Warning
Deleting a token immediately stops it from working and cannot be undone. Any integration using it will stop authenticating until you issue a new token.