Roles & Permissions
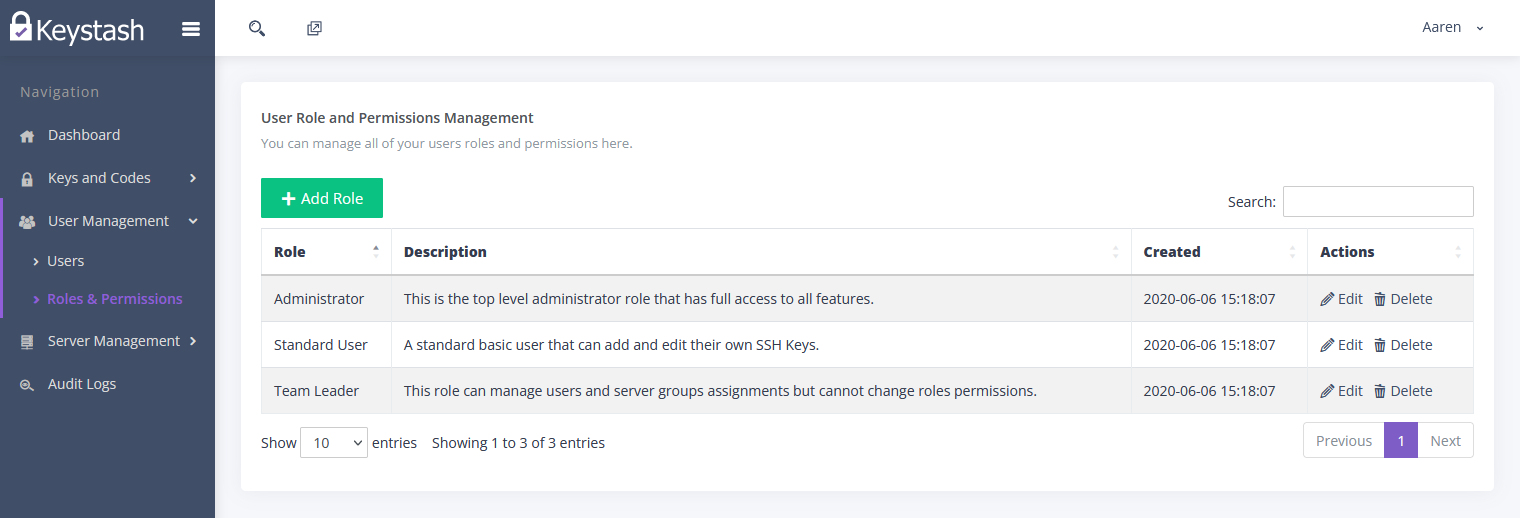
This guide will take you through everything related to the management of User Roles and Permissions in Keystash. Permissions are specific actions broken down by sections that control what a user can and cannot do or access. A Role is a collection of Permissions grouped together in such a way that mimics their day to day role. For example your account in Keystash will come with 3 default Roles pre-configured:
- Administrator This Role has full access to all sections and actions in Keystash.
- Team Leader This Role is designed for Senior leaders in your organization, enabling them to do most functions but do not have access to key Administration type actions.
- Standard User This Role is designed for a standard IT team member, Developer or QA employee.
Roles are assigned to a User account. If a User has been assigned the Administrator role, then they will be granted all the permissions that are configured for the Administrator role.
Add Roles
You can create or edit any of the roles if you have the required permissions. To Add a role:
- Click "User Management" on the menu and then "Roles & Permissions"
- Click "Add Role" at the top of the table
- Enter in a name for the role in the Name field.
- Enter a description of what the role will be used for in the Description field.
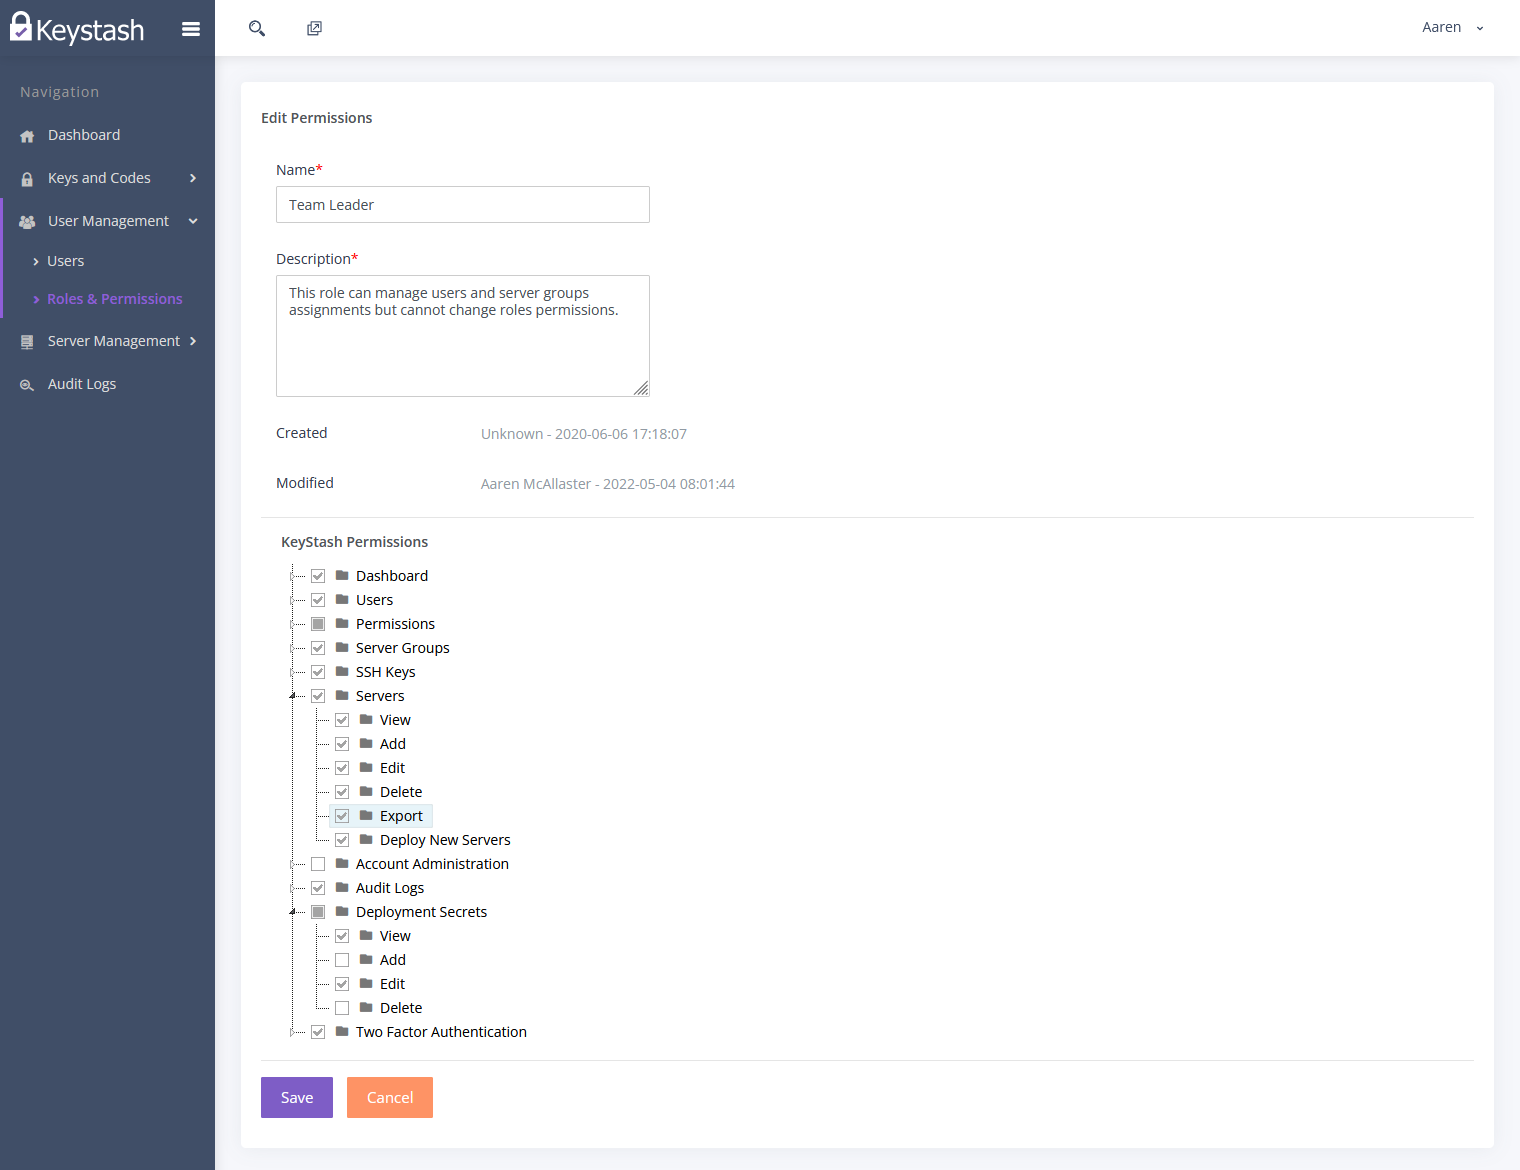
- You can now use the tree view to explore the various sections and actions available in Keystash. Use the arrows on the line to expand a section. The box next to the arrow indicates if All (Tick), None (Empty) or Some (Grey) of the permissions have been granted.
- In the diagram below you can see that only the "View" and "Edit" actions have been granted in the "Deployment Secrets" section.
- Click "Save" once you have granted all the required permissions to the role.
Note
When you make changes to a Role, the effects won't take place immediately if the user is currently logged in. The user will need to log out and then log in again for the permissions to take affect. The same applies if a user is given a new role while they are currently logged in.
Edit Roles
- Click "User Management" on the menu and then "Roles & Permissions"
- Click "Edit" in the actions column of the role you would like to edit.
- Enter in a name for the role in the Name field.
- Enter is a description of what the role will be used for in the Description field.
- You can now use the tree view to explore the various sections and actions available in Keystash. Use the arrows on the line to expand a section. The box next to the arrow indicates if All (Tick), None (Empty) or Some (Grey) of the permissions have been granted.
- Tick or un-tick the action you wish to grant to the role
- Click "Save" once you have granted all the required permissions to the role.
Note
When you make changes to a Role, the effects won't take place immediately if the user is currently logged in. The user will need to log out and then log in again for the permissions to take affect. The same applies if a user is given a new role while they are currently logged in.
Delete Roles
- Click "User Management" and the menu and then "Roles & Permissions"
- Click "Delete Role" in the actions column of the role you would like to delete.
- Click "Yes, please!" when prompted.
Warning
You cannot delete a role that is currently assigned to any users. First assign the users to a different role and then continue with the deletion.